Managing Board Settings
Rename a board, share it read-only with every signed-in user, choose which task fields show, and manage labels.
Opening Settings
Click the Settings tab at the top of a board to open Board settings. Every member of the board sees the tab. People viewing a shared board without being a member don't.
Name and Description
Change the board's Name and Description, then click Save, or Cancel to leave them as they were.
Only the board's owner can change these. On a board in an Organization's workspace, its org-admins can too. Everyone else sees a note saying only the owner can change them, in place of the form.
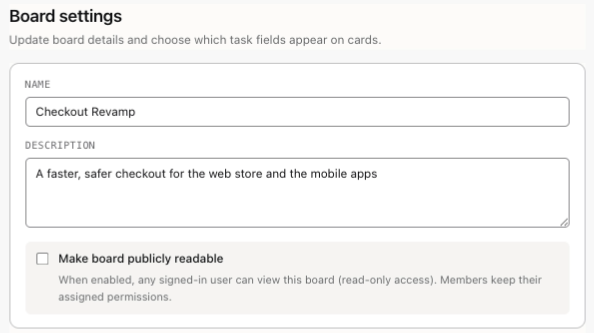
Sharing a Board Read-Only
Tick Make board publicly readable and click Save to let anyone signed in to Stride open the board from its link. They can read every task, including completion notes, and open the archive and metrics, but they can't change anything. A banner at the top of the board tells them it is shared publicly and read-only.
People who aren't signed in still can't see the board, and it doesn't appear in anyone else's list of boards. Members keep the access they already had. To make the board private again, untick the box and click Save.
Field Visibility
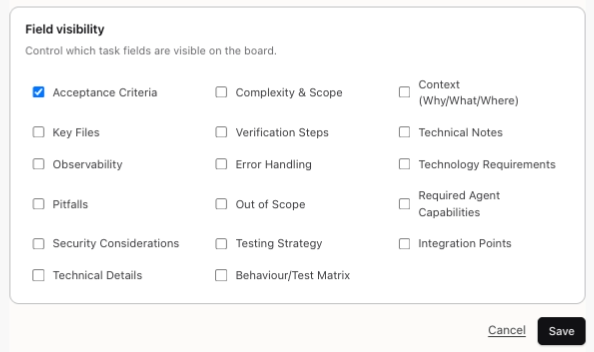
Field visibility chooses which task fields the board's screens show. Each toggle saves as soon as you click it, with no Save button. A new board shows only Acceptance Criteria. Turn on others, such as Key Files, Verification Steps, Pitfalls or Testing Strategy, when your team uses them.
Hiding a field only changes what the board shows. The data stays on the task, and agents can still fill hidden fields in through the API. Only the board's owner can change field visibility.
Labels
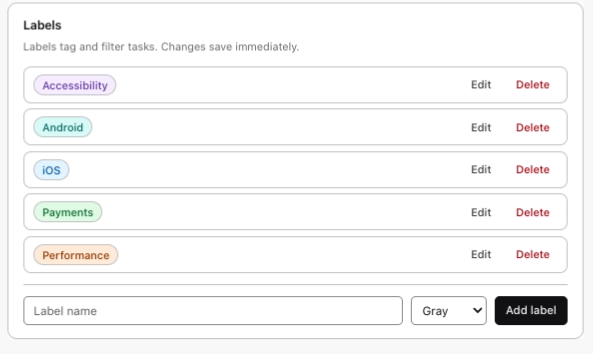
Labels tag tasks so you can find them later. To add one, type a name in Label name, pick one of nine colours, and click Add label. A name can be up to 40 characters, and no two labels on a board can share a name, ignoring capitals. Changes save immediately.
- Edit renames or recolours a label. Click Save when you're done.
- Delete removes the label from every task that has it. The tasks themselves stay.
The board's owner, its org-admins and members with modify access can manage labels. Read-only members see the list. To put a label on a task, tick it in the Labels section of the task form, or add it to many cards at once as Editing Many Cards at Once explains.
Who Can Change What
- Name, Description, sharing and Field visibility: the owner, and an Organization's org-admins on its boards.
- Labels: the owner, org-admins, and members with modify access.
- Every member can open Settings to see the labels.
To change someone's access, see Inviting Team Members.
You're all set!
You've completed all the steps in this guide.